Physical Address
304 North Cardinal St.
Dorchester Center, MA 02124
Physical Address
304 North Cardinal St.
Dorchester Center, MA 02124
In the “re-localization” era of 2026, the value of a brand is no longer measured in pixels – it’s measured in wood, steel, and leather. For the modern artisan, the ability to generate a stunning logo using Midjourney or Flux is only half the battle. The true “technical gap” lies in the transition from a digital image to a physical product.
If you try to send a standard PNG or JPEG to a CNC router or a laser engraver, the machine will simply stare back at you. Machines don’t see colors or shadows; they see paths. To turn your AI vision into a physical branding iron or a shop sign, you must master the art of vectorization.
Most AI generators output raster images. These are made of pixels—tiny squares of color. When you zoom in, they get blurry. A CNC machine (Computer Numerical Control) requires vector data. Vectors are mathematical paths—lines and curves defined by coordinates.+1
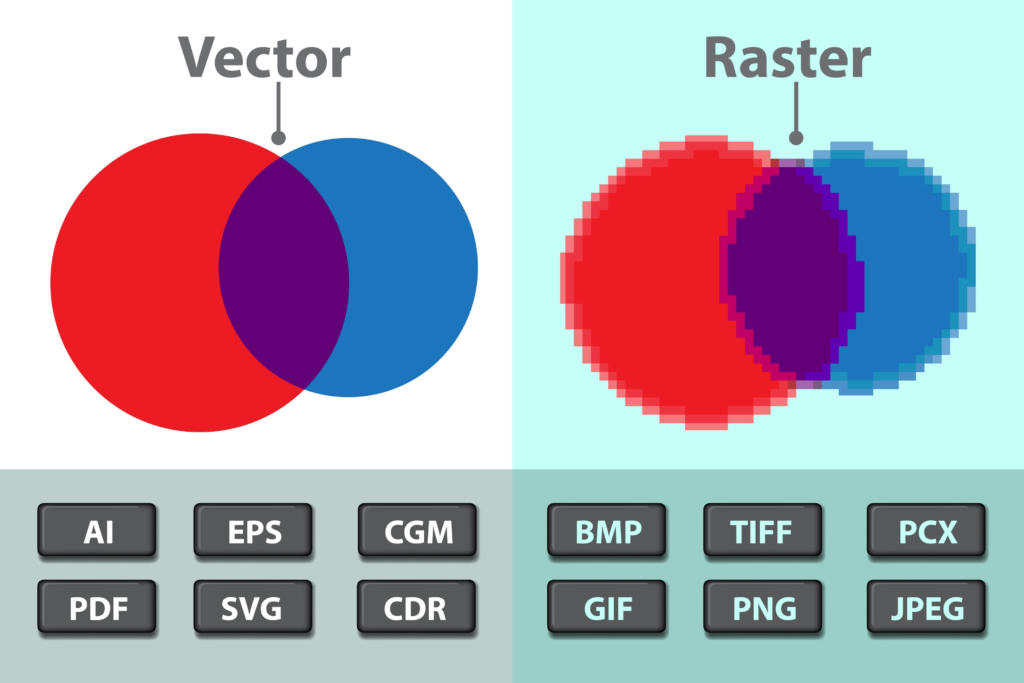
If your AI logo has “digital noise” or soft edges, the CNC toolpath will try to follow every single stray pixel, resulting in a jagged, unprofessional finish that can ruin expensive hardwood or metal.
This is the same reason Why Your AI Favicon Looks Blurry & Pixelated, the lack of sharp, defined paths makes small-scale reproduction nearly impossible. For CNC work, “blurry” doesn’t just look bad—it breaks the machine’s logic.
The secret to a perfect vector conversion starts in the prompt. If you give the vectorizer a messy image, you’ll get a messy path. In 2026, we use Pre-Vector Prompting to save hours of manual cleanup.
When generating your logo, always add: “–no shadows, –no gradients, high contrast, black and white, flat 2d vector style, thick lines, minimalist emblem.”
By forcing the AI to work in high-contrast monochrome, you create a “binary” image that vectorization software can interpret with 99.9% accuracy. Avoid the “Vintage Lithograph” style for physical branding irons; the fine cross-hatching is a nightmare for CNC bits smaller than 1/8th inch.
Once you have your high-contrast AI image, follow this three-step workflow to prepare it for fabrication:
Before converting, use a tool like Magnific or Topaz Photo AI to “solidify” the edges. This removes the “fuzz” often found in Midjourney v6.1 renders. You want the transition between black and white to be as sharp as a razor.
You have two primary paths here:
Window > Image Trace. Set the Mode to “Black and White” and push the “Paths” slider to 90%. This forces the software to follow the AI’s curves more tightly.AI-generated vectors often have “anchor point bloat”—thousands of unnecessary dots along a single line. In 2026, CNC software like VCarve or Carbide Create can lag if the file is too complex. Use the “Simplify Path” tool to reduce the anchor point count while maintaining the shape.
This is where most designers fail. A logo that looks good on a screen might be physically impossible to carve.
Not all vectors are created equal. Depending on your machine, you will need one of two formats:
As we discussed in our guide on 5 Best AI Logo Generators, AI still struggles with perfect typography. For CNC work, “wonky” text is a disaster.
The 2026 Workaround: Generate the emblem only in AI. Export the vector. Then, manually add your text in a CAD-friendly font (like a “Single Line Font” or “Stencil Font”) within your design software. This ensures that the letters don’t “fall out” when the machine cuts through the material.